VisionML-Simplified
Using Apple’s Vision, HandPose, and Create/Core ML - simplified!
The Goal
Learning (and any anything else in life) should be easy and fun. The goal in this article is to simplify the building block for using Apple’s Machine Learning framework and its Vision framework to a bare minimum - get it to work and easy to understand. Then, from thereon we can expand our understanding to tackle more complex work.
The plan
- Use Xcode Developer Tool to train ML Model to classify hand-posture images
- Get images from device’s camera
- Use our trained ML model to classify the images captured from the camera
- Re-train our ML model, i.e. make it more accurate
- Bob is your uncle and the world is our oyster. Let’s do something cool about this!
Requirements
- A Mac. Preferrably Silicon M-series (mine is M1 with 16GB RAM)
- Xcode 16 (beta 2) or newer
Source code
The full source code used in this article can be downloaded (cloned) from my public Github here:
Part 1 - Create a (ML) Model
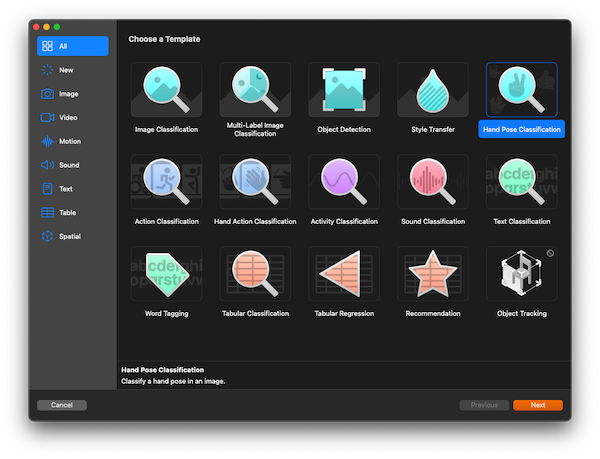
Xcode 16 (Beta), comes with Create ML tool and several preset templates, i.e., Image Classification, Multi-label Image Classification, Hand Pose Classification. Hand Pose Classification! Interesting! This was the first time I tried my hand on this UI tool.
Some background, I have been using Core/Create ML before, by coding, not by using the UI tool.
Let’s see how hard it can be
Embarrassingly enough, it took me a while to find where to activate this tool.
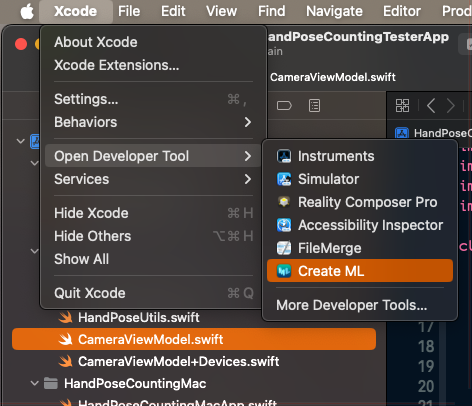
I have to say, Apple did well on easy-to-use department. I clicked around and just followed the instructions. Everything seemed to work (with only a few trial and error).

Right! Looking at the pop-up hint.
It gave an instruction on the training process - okey, this should be as simple as creating a folder structure for training, testing, and validation. Within each folder, create a sub-folder for each label. Then, my guess, for each label, give it a set of images that represents each number. Easy!
Let’s prepare Training Directories and Data.
$ mkdir mldata
$ cd mldata
$ mkdir training testing validation
Create 10 sub directories for each.
$ cd training
$ mkdir 1 2 3 4 5 6 7 8 9 10
Repeat the above command for testing and validation folders.
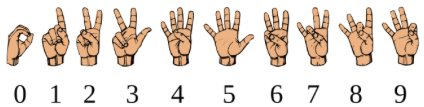
Now, I just needed some images to train my Hand Pose classifier. I took several pictures of my hand gestures and put them under each folder. By the way, I used American Sign Language for counting with one hand. For more information, please see References section below.

Again, the goal of this post is to demonstrate simplicity, so we will keep the training process as simple as possible. We will keep it to minimum, i.e. 2-4 images for each label. I opted to not provide images for testing for now and let the tool auto generate test images by subsetting them from the training images. We can always come back here and retrain our ML model, see Part 4 below. Once, Create ML tool has enough images, the train button should be enabled.
Start training ML
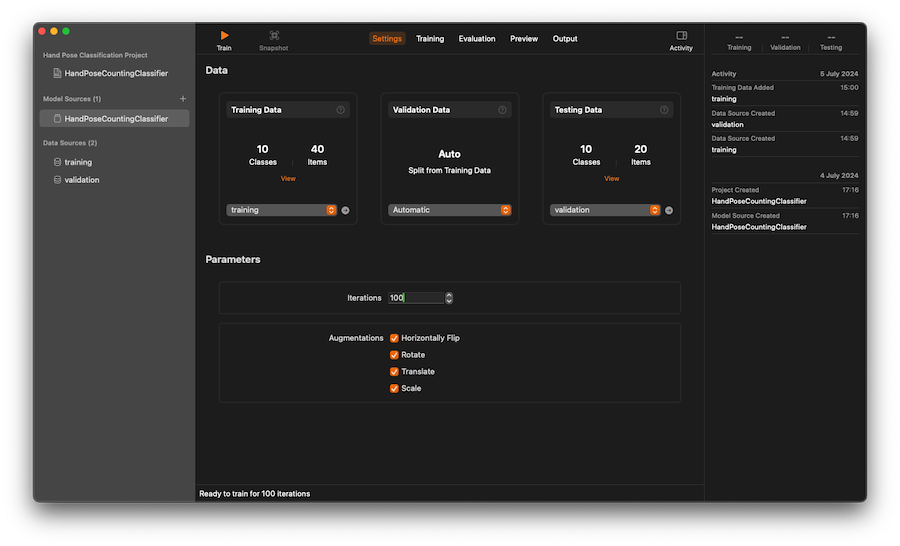
Training

After training process is completed, you can inspecting the result in each tab. You can even view a live preview!
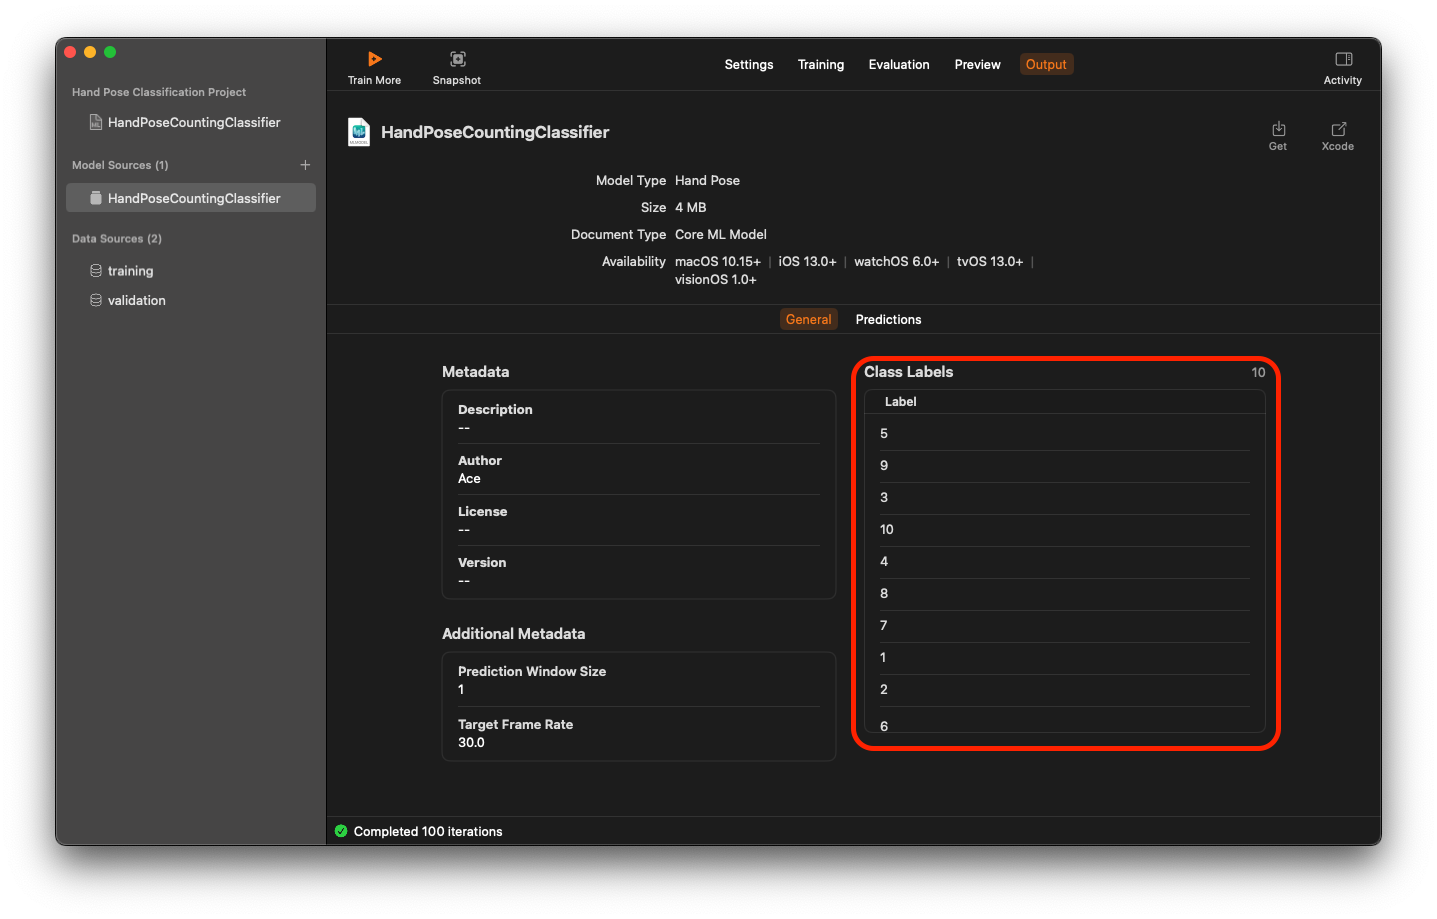
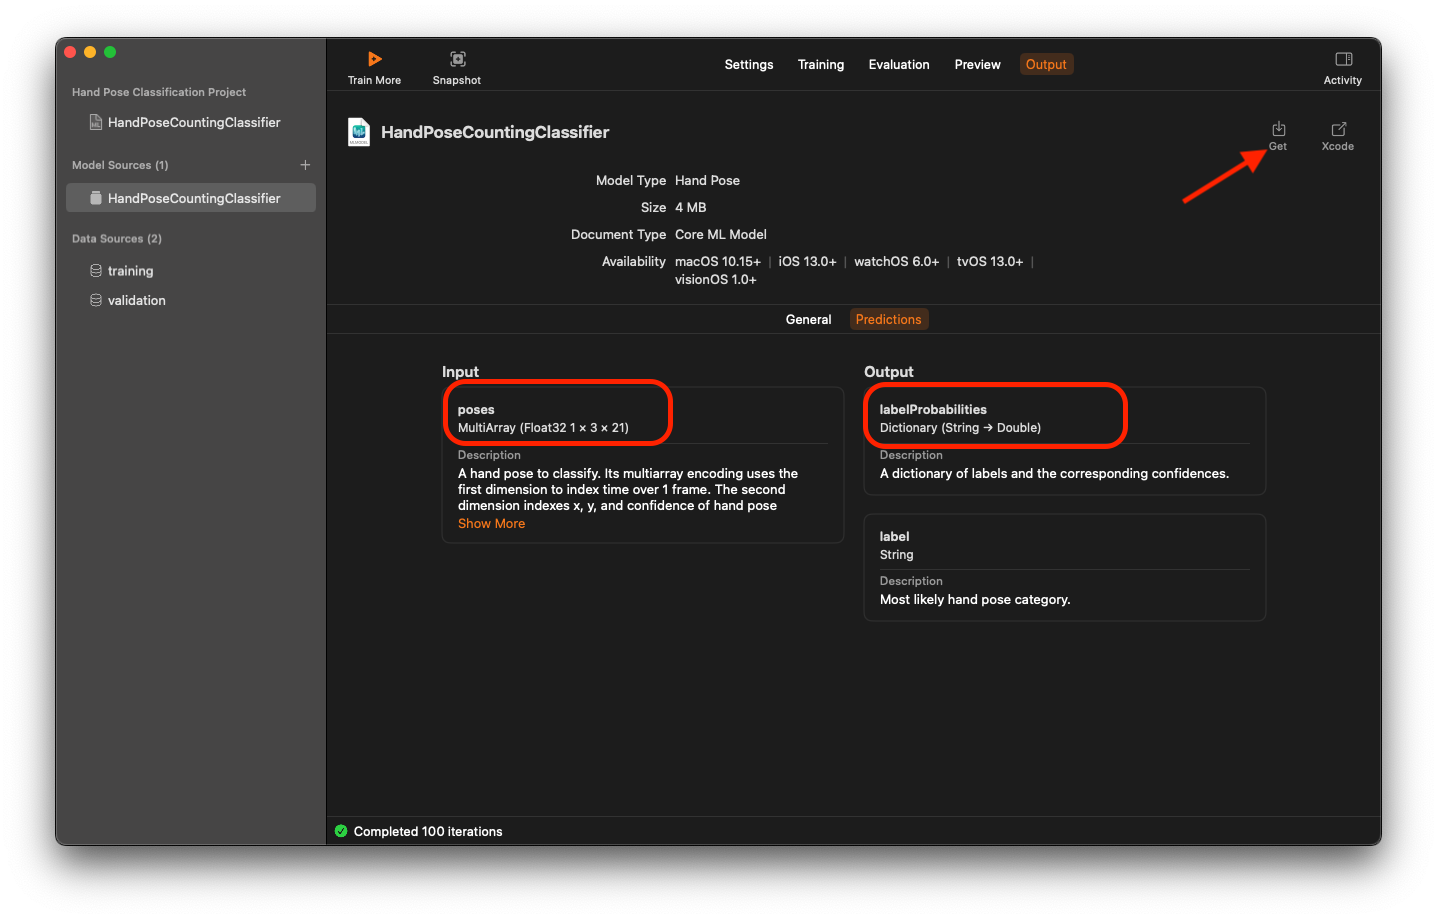
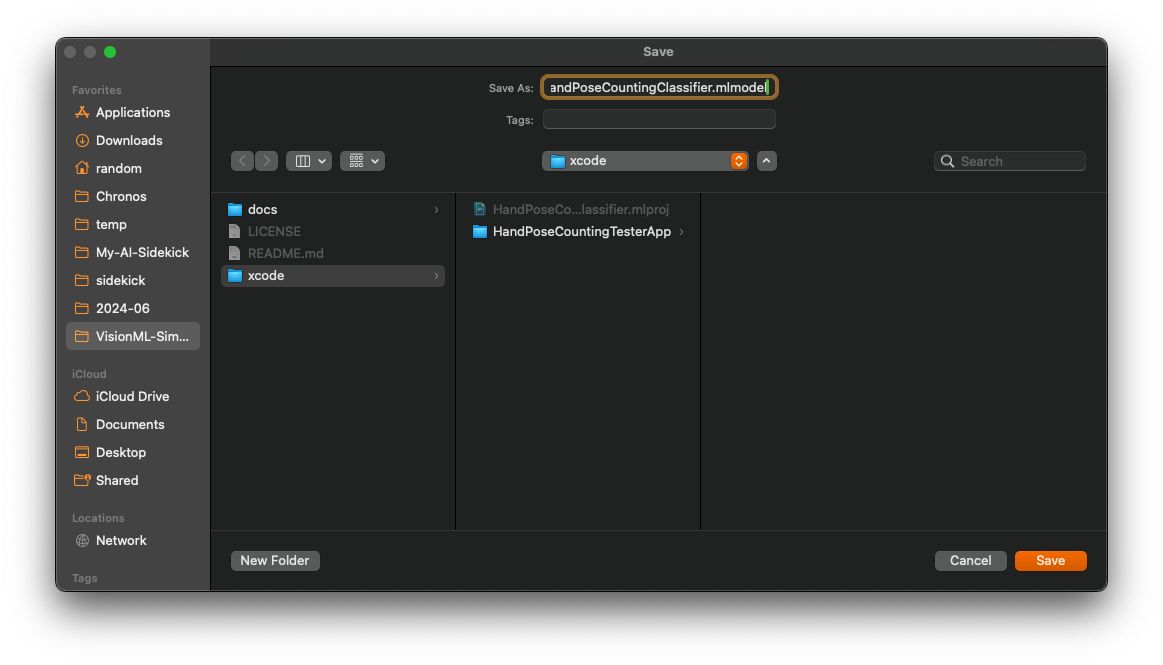
The final step for this section is to produce a ML model that we can use in our code in the next section.
Select on the Output tab, and click ‘Get’ to export as .mlmodel file. Give it any name. Note that this name will be used as a class name for our ML classifier during our coding phase.
Part 2 - Capture Images from Camera
Now, we have a Machine Learning model that classifies hand-pose images. Next, we need to get some images, from somewhere, to work with our ML model.
We will use AVFoundation to capture images from device’s camera and use them in our app.
Setup a camera
import AVFoundation
import Vision

class CameraViewModel: NSObject, ObservableObject {
    ...
    private let session = AVCaptureSession()
    private let videoOutput = AVCaptureVideoDataOutput()
    ...

    override init() {
        super.init()
        setupCamera()
        ...
    }
}
And the setupCamera() function.
    private func setupCamera() {
        session.beginConfiguration()

        guard let camera = getCaptureDevice(),  // (1)
              let input = try? AVCaptureDeviceInput(device: camera),
              session.canAddInput(input) else {
            print("Error setting up camera input")
            return
        }

        session.addInput(input)

        let videoQueue = DispatchQueue(label: "videoQueue")
        videoOutput.setSampleBufferDelegate(self, queue: videoQueue)    // (2)
        videoOutput.videoSettings = [
            kCVPixelBufferPixelFormatTypeKey as String: kCVPixelFormatType_32BGRA
        ]

        guard session.canAddOutput(videoOutput) else {
            print("Error adding video output")
            return
        }

        session.addOutput(videoOutput)
        session.commitConfiguration()
        session.startRunning()
    }
(1) getCaptureDevice(), I want our app to run on both macOS and on iOS/iPadOS. Setting up
a camera on these devices requires platform-specific code. For example, on iPhone, I’d like to use
front-facing camera. I also want to keep our code simple and clean - not to pollute it with platform specific codes,
To do this, I refactored the code that handles platform-specific out into a separate file.
extension CameraViewModel {
    ...
    func getCaptureDevice() -> AVCaptureDevice? {
#if os(macOS)
        guard let camera = AVCaptureDevice.default(for: .video) else {
            print("Error setting up camera input")
            return nil
        }
#else
        guard let camera = AVCaptureDevice.default(
            .builtInWideAngleCamera,
            for: .video, position: .front
        ) else {
            print("Error setting up camera input")
            return nil
        }
#endif
        return camera
    }

    // (3)
    func handleDeviceOrientation(connection: AVCaptureConnection) {
#if os(iOS)
        if connection.isVideoOrientationSupported,
           let videoOrientation = videoOrientationFor(deviceOrientation) {
            connection.videoOrientation = videoOrientation
        }
#endif
    }

    ...
}
(2) Next, I wanted to process the captured images. Somehow.
Looking at videoOutput.setSampleBufferDelegate(self, queue: videoQueue), the frameworkd will call delegate’s function captureOutput(_:didOutput:from) passing CMSampleBuffer as an input. This is where we will process this data into the image that we can work with.
Let’s conform to this protocol and then figure out what to do with the captured images.
extension CameraViewModel: AVCaptureVideoDataOutputSampleBufferDelegate {

    func captureOutput(
        _ output: AVCaptureOutput,
        didOutput sampleBuffer: CMSampleBuffer,
        from connection: AVCaptureConnection
    ) {
        guard let pixelBuffer = CMSampleBufferGetImageBuffer(sampleBuffer) else { return }
        handleDeviceOrientation(connection: connection)     // (3)

        // We will figure out what to do with the image here.
    }

}
(3) On iPhone, I needed to handle when the phone is rotated. Again this is platform specific handling,
I wrapped this device-specific code inside a function to keep the main logic clean. As you can see,
handleDeviceOrientation(connection:) doesn’t do anything for macOS as I don’t expect to rotate my mac around 😉.
Display the captured images
At this point, the app looks very dumb and dull. Does it even do anything? Let’s add some code to show that our app actually captures images from the camera.
extension CameraViewModel: AVCaptureVideoDataOutputSampleBufferDelegate {

    func captureOutput(
        _ output: AVCaptureOutput,
        didOutput sampleBuffer: CMSampleBuffer,
        from connection: AVCaptureConnection
    ) {
        guard let pixelBuffer = CMSampleBufferGetImageBuffer(sampleBuffer) else { return }
        handleDeviceOrientation(connection: connection)     // (3)

        updateFrameImage(pixelBuffer)   // (4b)
    }

}
Let’s update our CameraViewModel to publish an image for each frame that we capture.
#if os(macOS)
typealias HandPoseImage = NSImage
#else
typealias HandPoseImage = UIImage
#endif

class CameraViewModel: NSObject, ObservableObject {
    @Published @MainActor var frameImage: HandPoseImage?    // (4a)
    ...
}
At (4b), I added a call to a function that creates an image for each frame captured from the camera.
At (4a), we will store it as a class property. We will also publish it so that it can be used (by caller) to display in our SwiftUI view.
...
    func updateFrameImage(_ pixelBuffer: CVImageBuffer) {
        let ciImage = CIImage(cvPixelBuffer: pixelBuffer)
        let context = CIContext()
        guard let cgImage = context.createCGImage(ciImage, from: ciImage.extent) else { return }
#if os(macOS)
        let image = NSImage(cgImage: cgImage, size: .zero)
#else
        let image = UIImage(cgImage: cgImage)
#endif
        DispatchQueue.main.async {
            self.frameImage = image
        }
    }
We can use this image, here, for example.
import SwiftUI
struct ContentView: View {
    @StateObject private var cameraViewModel = CameraViewModel()

    var body: some View {
        ZStack {
            if let frameImage = cameraViewModel.frameImage {
                HandPoseImageView(handPoseImage: frameImage)
                    .frame(maxWidth: .infinity, maxHeight: .infinity)
                    }
            } else {
                Text("No Camera Feed")
            }
        }
        .background(Color.black)
        .edgesIgnoringSafeArea(.all)
    }
}

...
struct HandPoseImageView: View {
    var handPoseImage: HandPoseImage
    var body: some View {
#if os(macOS)
        Image(nsImage: handPoseImage)
            .resizable()
            .scaledToFit()
#else
        Image(uiImage: handPoseImage)
            .resizable()
            .scaledToFit()
#endif
    }
}
At this point, I can now see my handsome face doing some silly gestures to the camera.
Excellent!
Part 3 - Using ML Model for Hand Pose Classification
Loading Hand Post Classification Model
Now, it’s time to use our ML model that we created from part 1. To do this, simply, drag and drop our
mlmodel file into Xcode.
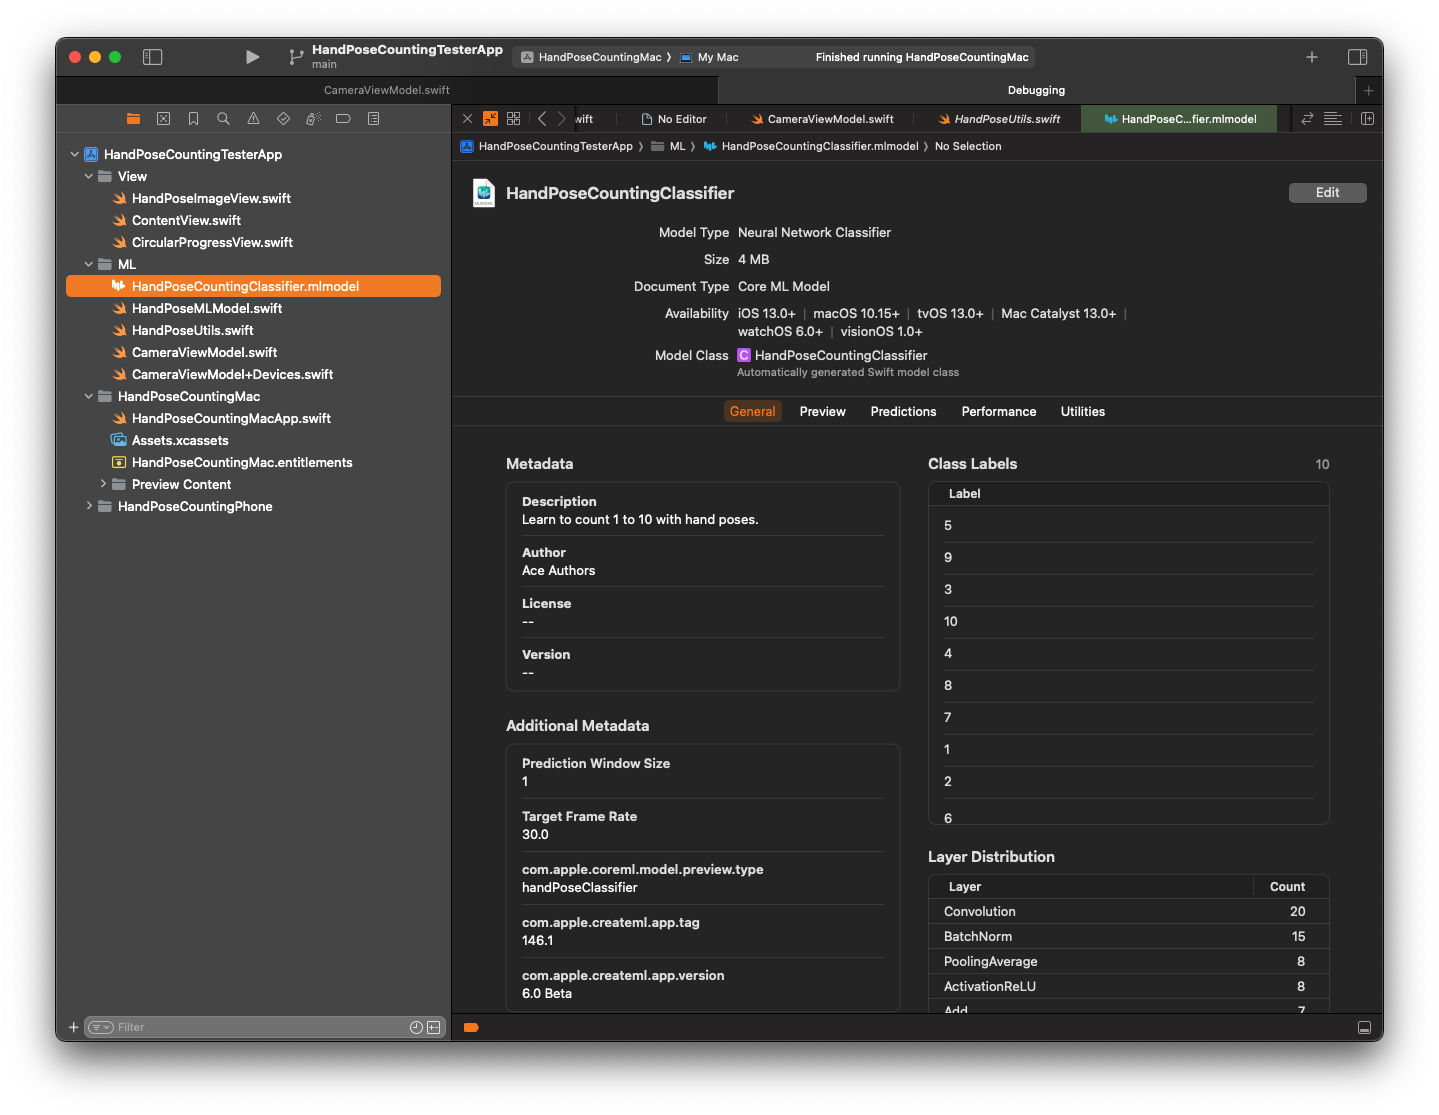
We will load this ML model into our CameraViewModel.
class CameraViewModel: NSObject, ObservableObject {
    @Published @MainActor var frameImage: HandPoseImage?
    ...
    private var mlModel: HandPoseMLModel!
    ...

    override init() {
        super.init()
        setupCamera()

        Task {
            do {
                mlModel = try await HandPoseMLModel.loadMLModel()
                ...
            } catch {
                print("ERROR: Initialising ML classifier: \(error)")
            }
        }
    }
    ...
}
HandPoseMLModel is really a simple class that wraps around MLModel.
final class HandPoseMLModel: NSObject, Identifiable {
    let mlModel: MLModel

    private var classLabels: [Any] {
        mlModel.modelDescription.classLabels ?? []
    }

    init(mlModel: MLModel) {
        self.mlModel = mlModel
    }

    func predict(poses: HandPoseInput) throws -> HandPoseOutput? {
        let features = try mlModel.prediction(from: poses)
        let output = HandPoseOutput(features: features)
        return output
    }
}
And to load our ML model.
extension HandPoseMLModel {
    static func loadMLModel() async throws -> HandPoseMLModel? {
        do {
            let model = try HandPoseCountingClassifier(configuration: MLModelConfiguration()).model
            return HandPoseMLModel(mlModel: model)
        } catch {
            return nil
        }
    }
    ...
}
Using Hand-Pose ML Model
We now can use our ML model to predict hand poses from images captured via our camera.
Let’s modify our captureOutput(_:didOutput:from) function to use this classifier, see (5).
    func captureOutput(
        _ output: AVCaptureOutput,
        didOutput sampleBuffer: CMSampleBuffer,
        from connection: AVCaptureConnection
    ) {
        guard let pixelBuffer = CMSampleBufferGetImageBuffer(sampleBuffer) else { return }
        handleDeviceOrientation(connection: connection)
        predictHandPose(pixelBuffer)    // (5)
        updateFrameImage(pixelBuffer)
    }
The function implementation is here.
    private func predictHandPose(_ pixelBuffer: CVImageBuffer) {
        ...
        // (6)
        let imageRequestHandler = VNImageRequestHandler(cvPixelBuffer: pixelBuffer, orientation: .up)
        Task { @MainActor in
            do {
                try imageRequestHandler.perform([handPoseRequest])      // (7)
                if let observation = handPoseRequest.results?.first {
                    let poseMultiArray = try observation.keypointsMultiArray()
                    let input = HandPoseInput(poses: poseMultiArray)
                    if let prediction = try mlModel.predict(poses: input) {     // (8)
                        print("Hand pose: \(prediction.label)")
                    }
                }
            } catch {
                print("Error performing request: \(error)")
            }
        }
    }
(6), Notice that our ML classifier accepts multi-array of hand postures. Apple provides a framework , see ‘import Vision’ at the top of ‘CameraViewModel’) to handle the bulk of the work here. In order to use Vision, we need to create a hand-pose request, see (7). Let’s add a property to our model to keep track of this request.
class CameraViewModel: NSObject, ObservableObject {
    @Published @MainActor var frameImage: HandPoseImage?
    ...
    private var mlModel: HandPoseMLModel!

    // (7)
    lazy private var handPoseRequest: VNDetectHumanHandPoseRequest = {
        let request = VNDetectHumanHandPoseRequest()
        request.maximumHandCount = 1
        return request
    }()
    ...

    override init() {
        super.init()
        ...
    }

    ...
}
(8) now that we’ve converted a captured image into multi-array, we can feed it as an input to our ML model. Our ML model gives best prediction for a given image. Running our app at this stage, you should see our ML model predicts each gesture and displays the outputs (as string) in the Xcode’s debug console.
Now, What are we going to do with this power?
From here on, the usage is limited only by our imagination!
Part 4 - (Re)Training you ML Model
From the demo video at the beginning of this post, you may notice that the ML model struggles to recognise hand-pose for number 3. This is true as the training steps were simplified. The objective was to provide a minimum skeletal framework of Xcode project to get Apple Vision and Hand Pose ML to work at its simplesticity (I made up a new word here).
Now that we have a skeletal working project. Training and retraining can be done simply by
repeating Part 1 - Create ML Model, this can be repeated until the model produces satisfactory accuracy.
For example, you might like to give more variety of images for each number. Perhaps, give
different set of images for different background, and etc. Then, regenerate the output ML model file.
The new .mlmodel file can be dropped into the Xcode (replacing the old one), then rebuild the new
version of the app.
Part 5 - Let’s do something fun!
I am working our some fun project that utilises our ML model and the Vision framework. If you are interested, please check back here again to see what I come up with.
Thank you for reading my post.
Peace,
Ace