Package Management: Carthage & Xcode
Carthage (and Cocoapods) are package management software. You are getting involved with them when you stop re-inventing the wheels and start to reuse software components. Software Reusability is a powerful concept in software development, but that’s for another post. Today we will be looking at using Carthage to manage software dependency and see how it is working with our Xcode.
First, let’s pick what components are to be reused - for demonstrating purposes. I’ve always started a new project with the core functionality of the app. Test Driven Development (TDD) usually works when you already have a clear functional implementation to test. But, we are not at that stage yet. Normally with a new project, you are starting with ideas of what your app is going to do - how it should behave. This is leading down the Behaviour Driven Development (BDD). My projects always start with listing out the required behaviours. Quick and Nimble are very famous for doing this. Perfect! Let’s head down to their Github pages.
The Players & The Genre
The players:
- Macbook 2016 with 8GB
- Mac OS Mojave 10.14.4
- Xcode 10.2.1
- Carthage 0.33.0
The Genre:
-
Red-Green-Refactor Play
The style of this post will follow Test/Behaviour Driven Development (TDD/BDD) approaches known as Red-Green-Refactor approach - that is:
- Code (or Refactor) a little
- Test a little
- Fix a little
- Repeat again
Initial Xcode Workspace
In this series, we will be creating and working on several Xcode projects. It’s a good idea to group them all in a single workspace. Let’s create a workspace for our experiments.
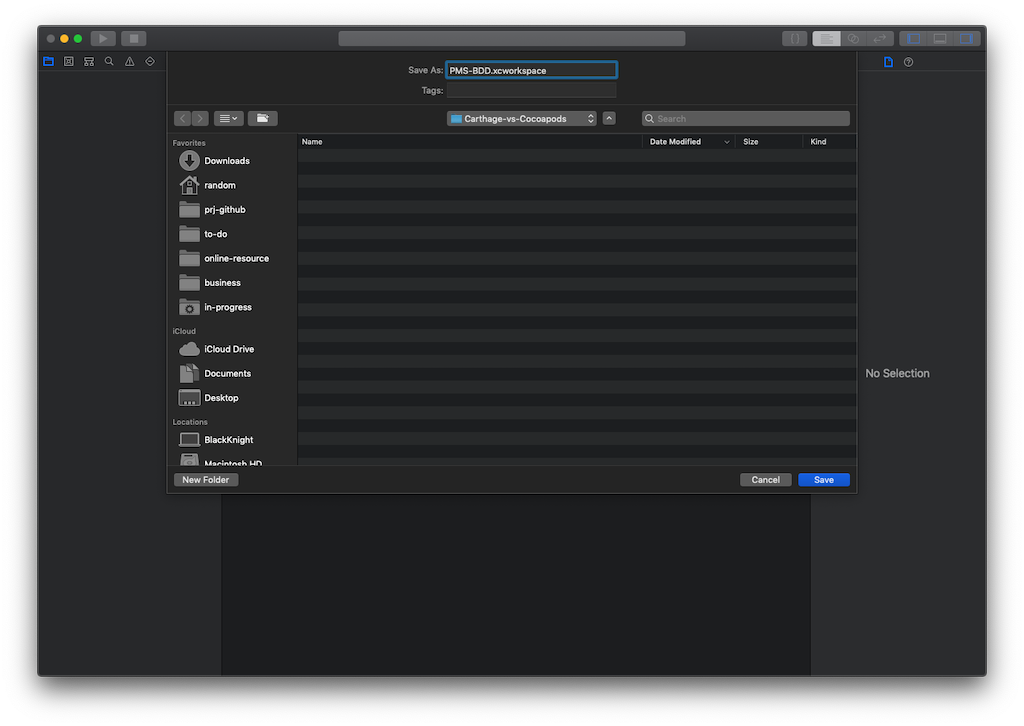
I created an empty workspace called ‘PMS-BDD’. Xcode creates a content package PMS-BDD.xcworkspace as below:
$ tree
.
└── PMS-BDD.xcworkspace
Next, let’s add an empty Xcode project. I created a project called BDD-Carthage
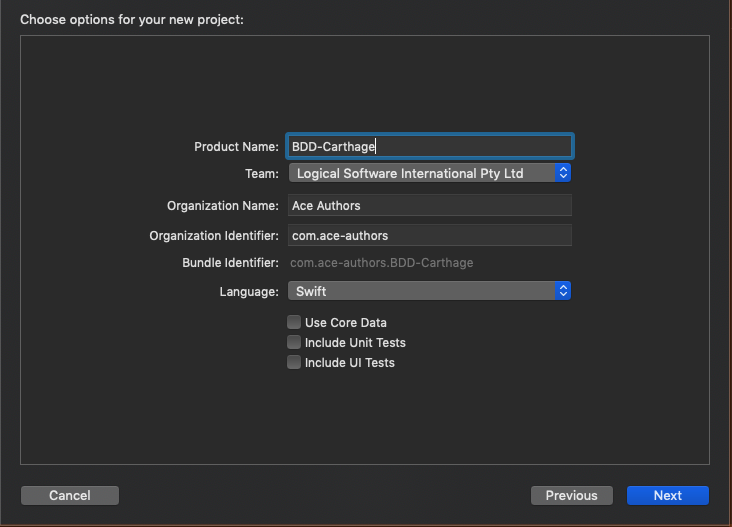
- Use ‘BDD-Carthage’ for Product Name
- Use ‘Swift’ for Language
- Uncheck Use Core Data, Include Unit Tests, and Include UI Tests. We will add them later manually
- Specify other details as suitable for your team and organisation settings
- Click Next
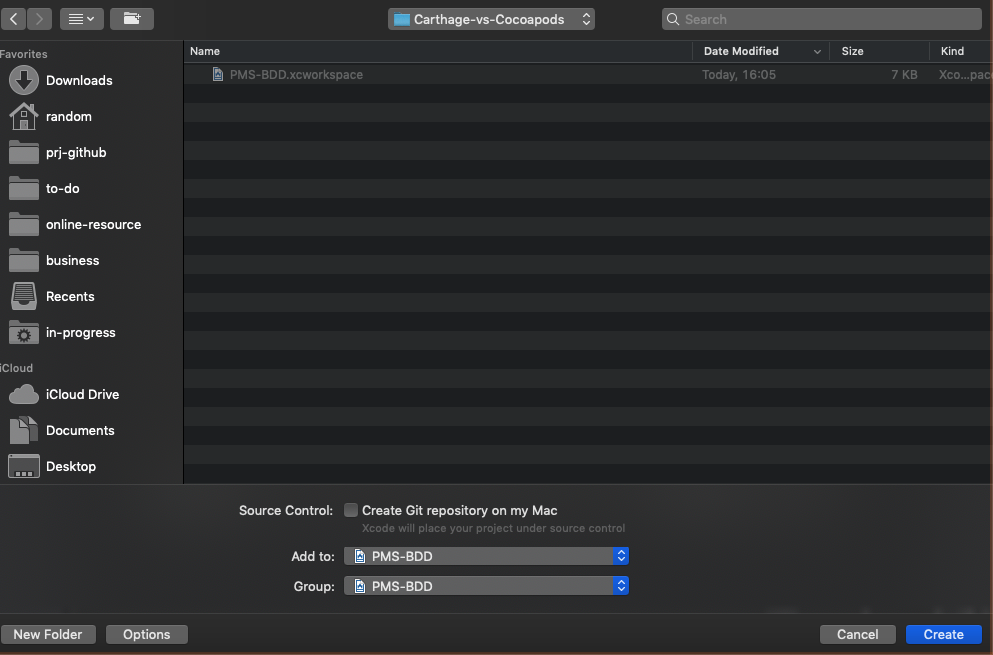
- Make sure to add this new project to PMS-BDD, as shown above
- Click Create
Notice Xcode creates a new project and how new files and folders are created, as shown below. Get yourself familiar with them, so when Carthage adds new folders and files, you will recognise them.
$ tree -L 2 -d
.
├── BDD-Carthage
│   ├── BDD-Carthage
│   └── BDD-Carthage.xcodeproj
└── PMS-BDD.xcworkspace
    ├── xcshareddata
    └── xcuserdata

6 directories
It is important to make sure that your project builds and runs on your chosen simulator - so when things are broken you know when and where to start fixing it.
Next, add the standard XCTest (TDD) test target. This will be handy for you to compare the standard XCTest cases against Quick & Nimble test cases.
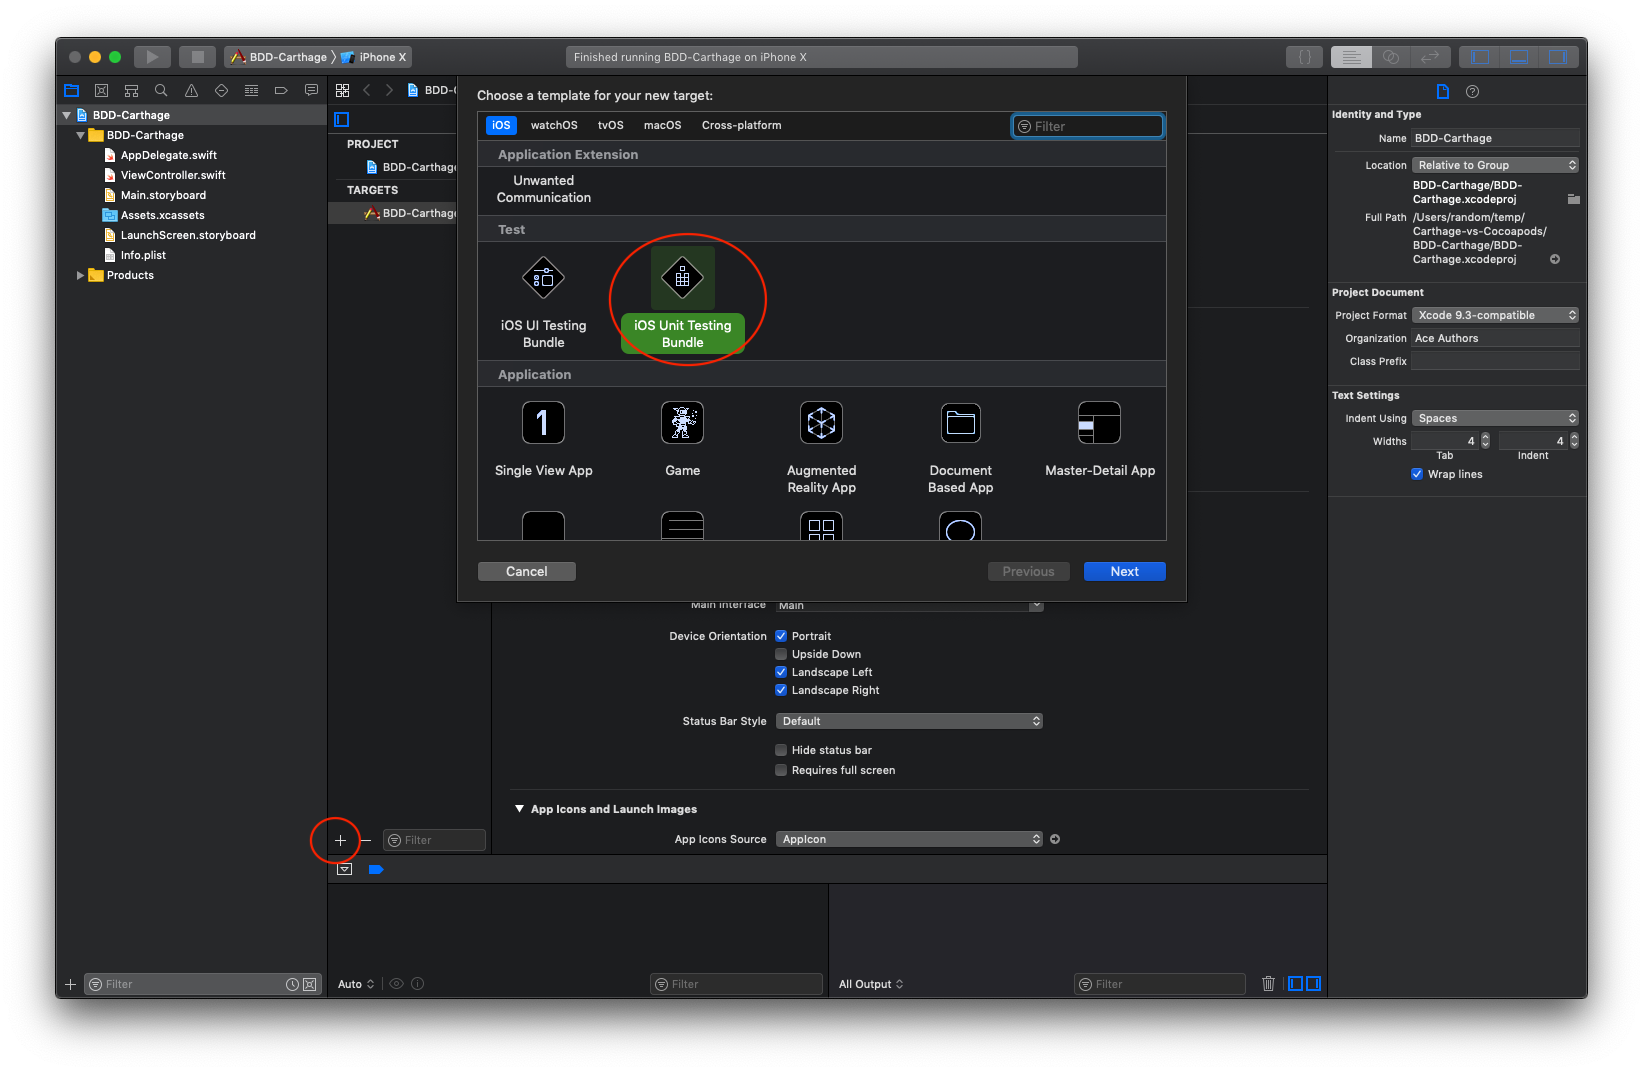
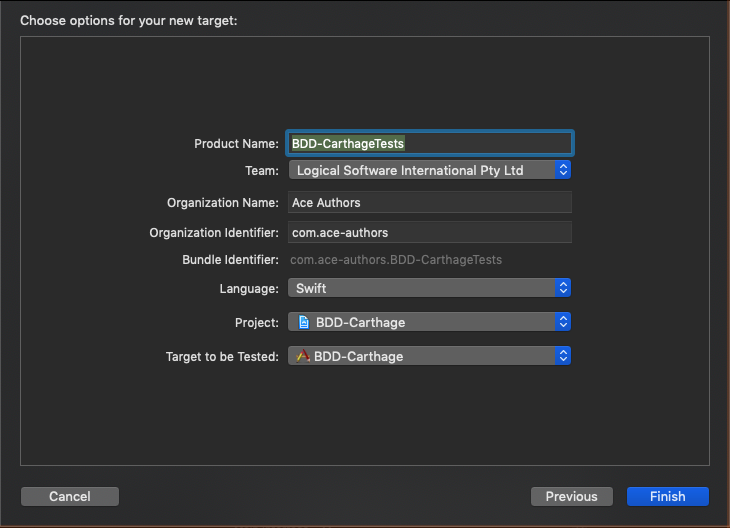
Your folders should look like below.
$ tree -L 2 -d
.
├── BDD-Carthage
│   ├── BDD-Carthage
│   ├── BDD-Carthage.xcodeproj
│   └── BDD-CarthageTests
└── PMS-BDD.xcworkspace
    ├── xcshareddata
    └── xcuserdata

7 directories
Now build and test your new test cases. They all must pass successfully before we can move on.
Next, we are going to add another test target. This one we are going to modify it to use Quick & Nimble for our BDD test cases. Let’s called it ‘BDD-QuickNimbleTests’.
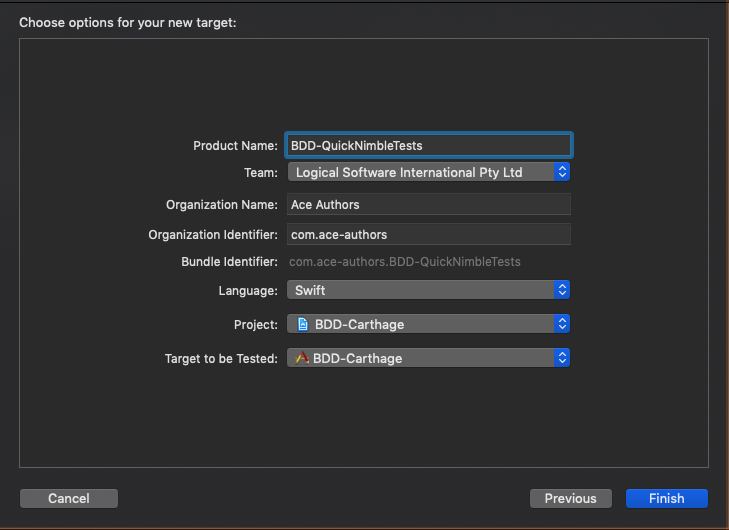
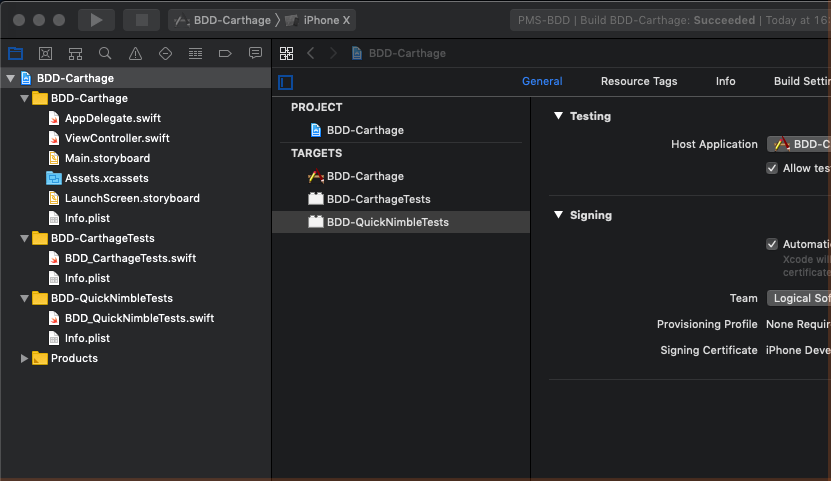
And folders and directories structure should look like this:
$ tree -L 2 -d
.
├── BDD-Carthage
│   ├── BDD-Carthage
│   ├── BDD-Carthage.xcodeproj
│   ├── BDD-CarthageTests
│   └── BDD-QuickNimbleTests
└── PMS-BDD.xcworkspace
    ├── xcshareddata
    └── xcuserdata

8 directories
Again, build and run all test targets and test cases. They must all work.
Test Criteria - The Required Behaviour
Ok, what are we testing here. We want to use Quick & Nimble which are 3rd-party reusable components. Let’s define the behaviour that we want.
-
Quick & Nimble must be loaded correctly
So, for this behaviour:
- Quick & Nimble frameworks must be included and our project to build correctly
- Our test case must be able to import the frameworks correctly
- Our test case must be able to instantiate the test case correctly
-
Our project must be able to define the basic (minimum) behaviours. These are:
- it() clause
- context() clause
- describe() clause
Assume basic knowledge of BDD and Quick & Nimble this is the minimum Test Spec (QuickSpec) we can use.
import Quick
import Nimble

class BDD_QuickNimbleTests: QuickSpec {

    func isWorking() -> Bool {
        return true
    }

    override func spec() {
        it("is working") {
            expect(self.isWorking()).to(beTrue())
        }
    }
}
Now let’s build and run all the test cases again. Except, you won’t even go far. You will be staring at the Xcode Editor’s error message even before you hit COMMAND-U. Xcode editor should scream in red: “No such module ‘Quick’”.
Great! This is good. So far, we’ve been following the Red-Green-Refactor methodology - we start with what works, and little-by-little we make changes, until it breaks. Then we fix it.
Integrating Quick & Nimble Using Carthage
Downloading and Building Quick & Nimbles Frameworks
Our project doesn’t build because it doesn’t know Quick & Nimble. In normal cases, we would acquire the binary files and manually add them to our project, build, and link them. This is tedious and error prone. Imagine that we would have to do this every time our components were upgraded and released with a new version. That’s why we use a package/dependency management software like the Carthage. We will let Carthage do that for us.
With Carthage, this is done by telling it all the components we want to use. We do this in a ‘Cartfile’ or ‘Cartfile.private’. Create a text file called Cartfile.private and put it in the same location where our .xcodeproj resides.
#Cartfile

github "Quick/Quick"
github "Quick/Nimble"
Let’s tell Carthage to build these components for us.
$ carthage update
*** Fetching Nimble
*** Fetching Quick
*** Checking out Quick at "v2.1.0"
*** Checking out Nimble at "v8.0.1"
*** xcodebuild output can be found in /var/folders/bq/184p_g29061_h33j3ky654wm0000gn/T/carthage-xcodebuild.5ChHIX.log
*** Building scheme "Nimble-macOS" in Nimble.xcodeproj
*** Building scheme "Nimble-iOS" in Nimble.xcodeproj
*** Building scheme "Nimble-tvOS" in Nimble.xcodeproj
*** Building scheme "Quick-macOS" in Quick.xcworkspace
*** Building scheme "Quick-tvOS" in Quick.xcworkspace
*** Building scheme "Quick-iOS" in Quick.xcworkspace
$
Carthage checks, resolves all dependencies, downloads source files, and builds them for us.
tree -L 3
.
├── BDD-Carthage
├── BDD-Carthage.xcodeproj
├── BDD-CarthageTests
├── BDD-QuickNimbleTests
├── Cartfile.private
├── Cartfile.resolved
└── Carthage
    ├── Build
    │   ├── Mac
    │   ├── iOS
    │   └── tvOS
    └── Checkouts
        ├── Nimble
        └── Quick
You will see, Carthage create these new items:
-
Cartfile.resolved
Carthage lists all the components and their versions here. It’s a quick place to check the versions of your components here. Also, it’s a good idea to commit this file in your source repository, this information will be handy for your team members to know. Let’s peek a look:
github "Quick/Nimble" "v8.0.1" github "Quick/Quick" "v2.1.0" -
‘Carthage’ folder
This is where Carthage puts all download files and built artefacts
-
‘Carthage/Checkouts’
This is where all the checkout source codes are
-
‘Carthage/Build’
These is where all the built artefacts are kept. Notice subfolder ‘Mac’, ‘iOS’, and ‘tvOS’. Since we did not specify which platform to use, Carthage assumes all. Usually, my project uses only one specific platform, you can tell Carthage to build for only the platform to use, i.e. ‘iOS’. This will reduce download and build time significantly.
```
$ carthage update --platform iOS

```
Switch back to Xcode, you will be still staring at the error message “No such module ‘Quick’”. This is because, we haven’t introduce Quick & Nimble to Xcode yet.
Introduce Quick & Nimble to Xcode
“Xcode, this is Quick and Nimble”, “Quick and Nimble, this is Xcode”
Done. It should be that simple. No?!. Unfortunately, this relationship requires a much more delicate manner and style.
Checking Quick’s Installation Guide, we need to add the two frameworks to our Test Target.
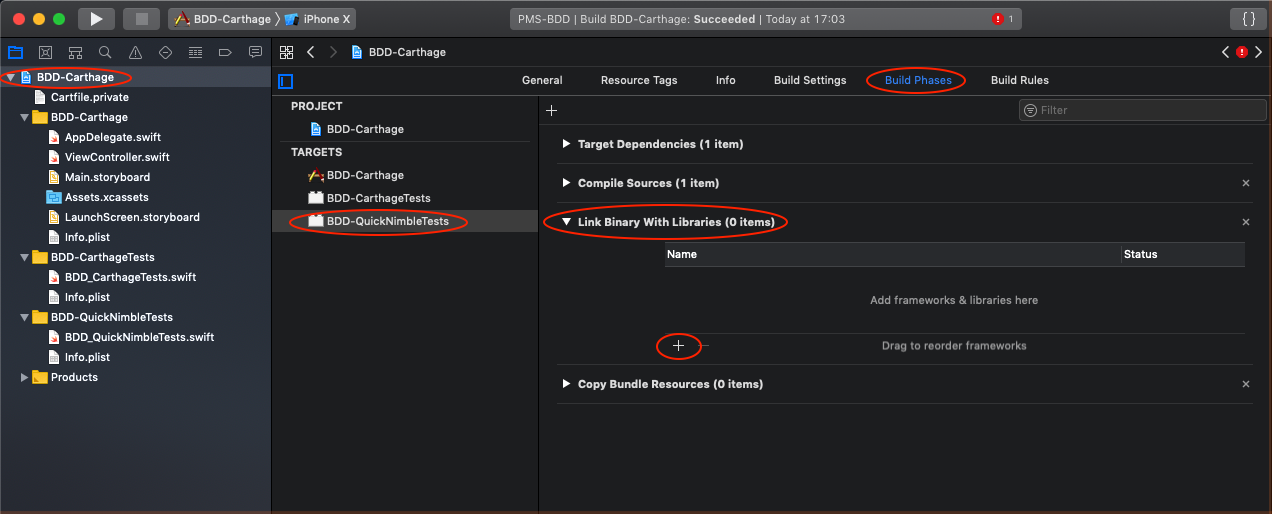
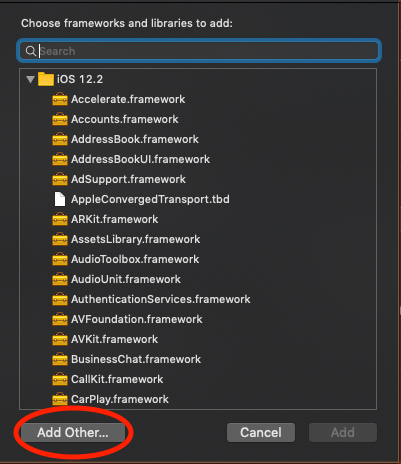
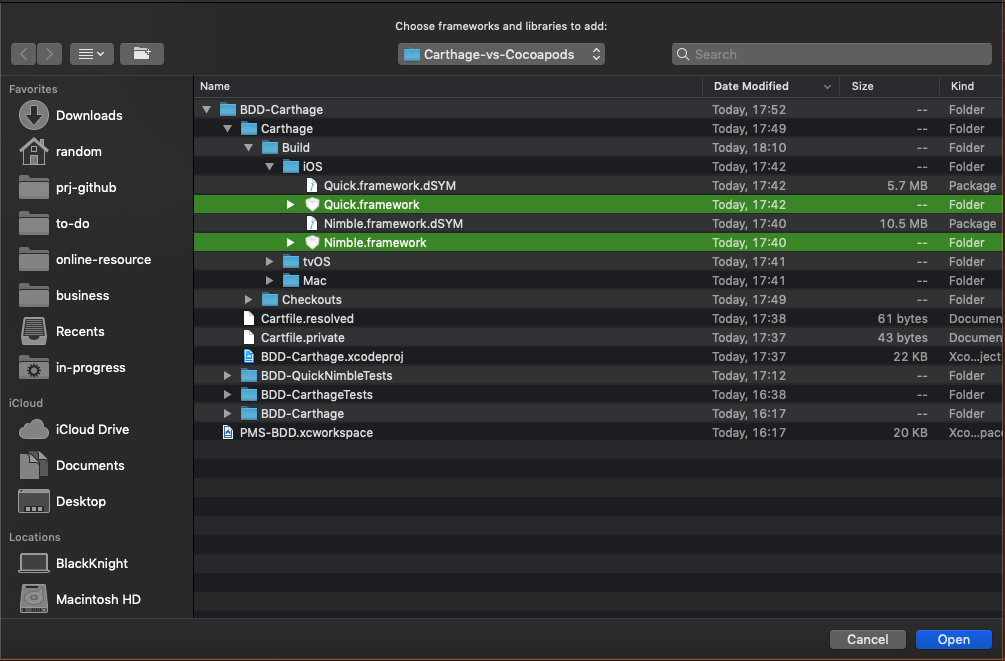
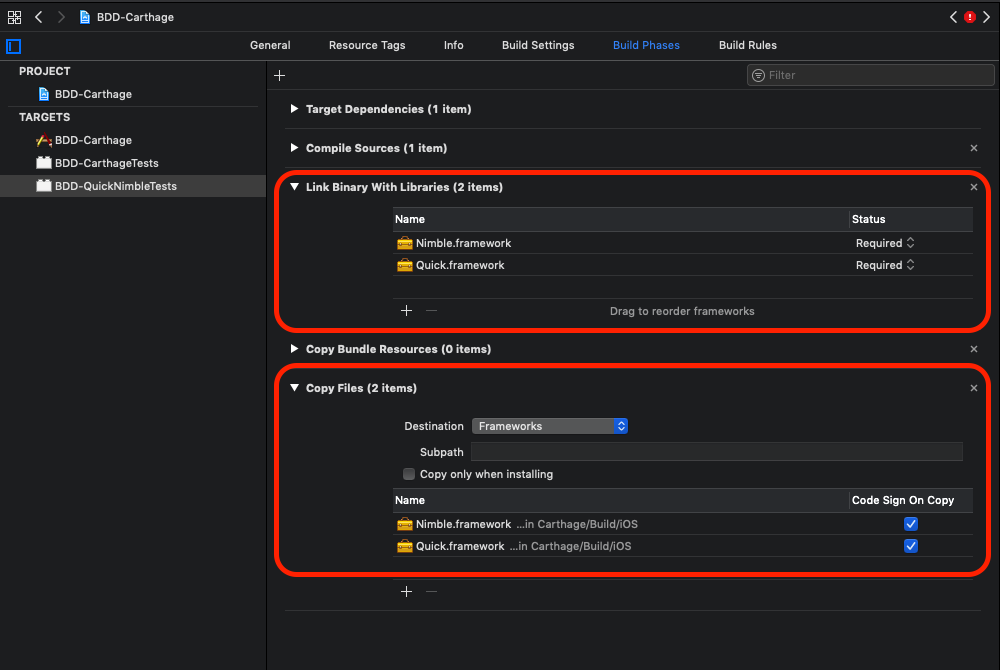
Remember the folder/directory structure that we looked at? Navigate to the folders where the build artefacts reside. We need to add these frameworks to our ‘Link Binary With Libraries’ section.
Add also add a new Copy File Phase. The ‘Build Phases’ of your project settings should look like this.
Click COMMAND + U to test your project and Ta Da! all test cases should all be successful. Now we are back in the green zone.
Let’s refactor our test class to cover the second required behaviour - be able to define behaviours for testing.
import Quick
import Nimble

class BDD_QuickAndNimbleTests: QuickSpec {

    func isWorking() -> Bool {
        return true
    }

    override func spec() {

        it("is working") {
            expect(self.isWorking()).to(beTrue())
        }

        context("When project has just been build") {
            it("is working") {
                expect(self.isWorking()).to(beTrue())
            }
        }

        describe("Quick and Nimble") {
            it("is working") {
                expect(self.isWorking()).to(beTrue())
            }
        }

        describe("Quick and Nimble") {
            context("When project has just been build") {
                it("is working") {
                    expect(self.isWorking()).to(beTrue())
                }
            }
        }
    }
}
Hit COMMAND+U, all your test cases should run successfully. Check Xcode’s Test Navigatior, notice how all your test cases are listed in human readable form there!
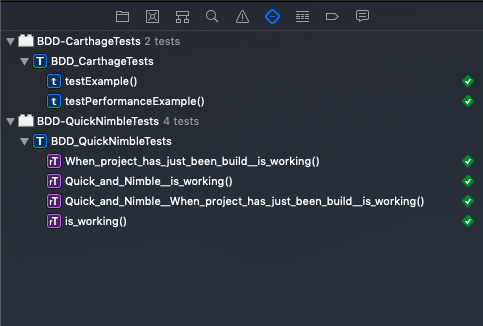
This was so fun! At this point, we have built ourselves the most basic - minimum Xcode project which utilises a package management software (Carthage) and integrates with 2 external 3rd-party components: Quick & Nimble. Once we understand and get our project to work on this minimum framework, we can easily and confidently expand and refactor our project for more functionality.
In the next post, we will be looking at doing the same thing - but with the Cocoapods package management.
Please stay tuned.
Cheers!